


Be the first to review this product
Kitchen cabinet led strip lighting KIT 14,4W/m strip 4000K (with Zigbee wireless dimmer)
In Stock
SKU
KITCHEN-SET-BASIC-4000K-144
Dimmable LED strip for kitchen - set includes:
- 5 meters of 14.4W/m 4000K led strip.
- Compatible power supply with a wireless Zigbee receiver.
- VaLO Zigbee series wireless button (can be placed on the wall or kept separate).
- Two surface-mounted aluminum profiles (2.52m*2 pcs). Several different profiles available.
- 5 meters of 3-pin cable and 2 quick connectors.
From €343.90
To €365.21
Kitchen cabinet led strip lighting KIT 14,4W/m strip 4000K (with Zigbee wireless dimmer) is available to buy in increments of 1
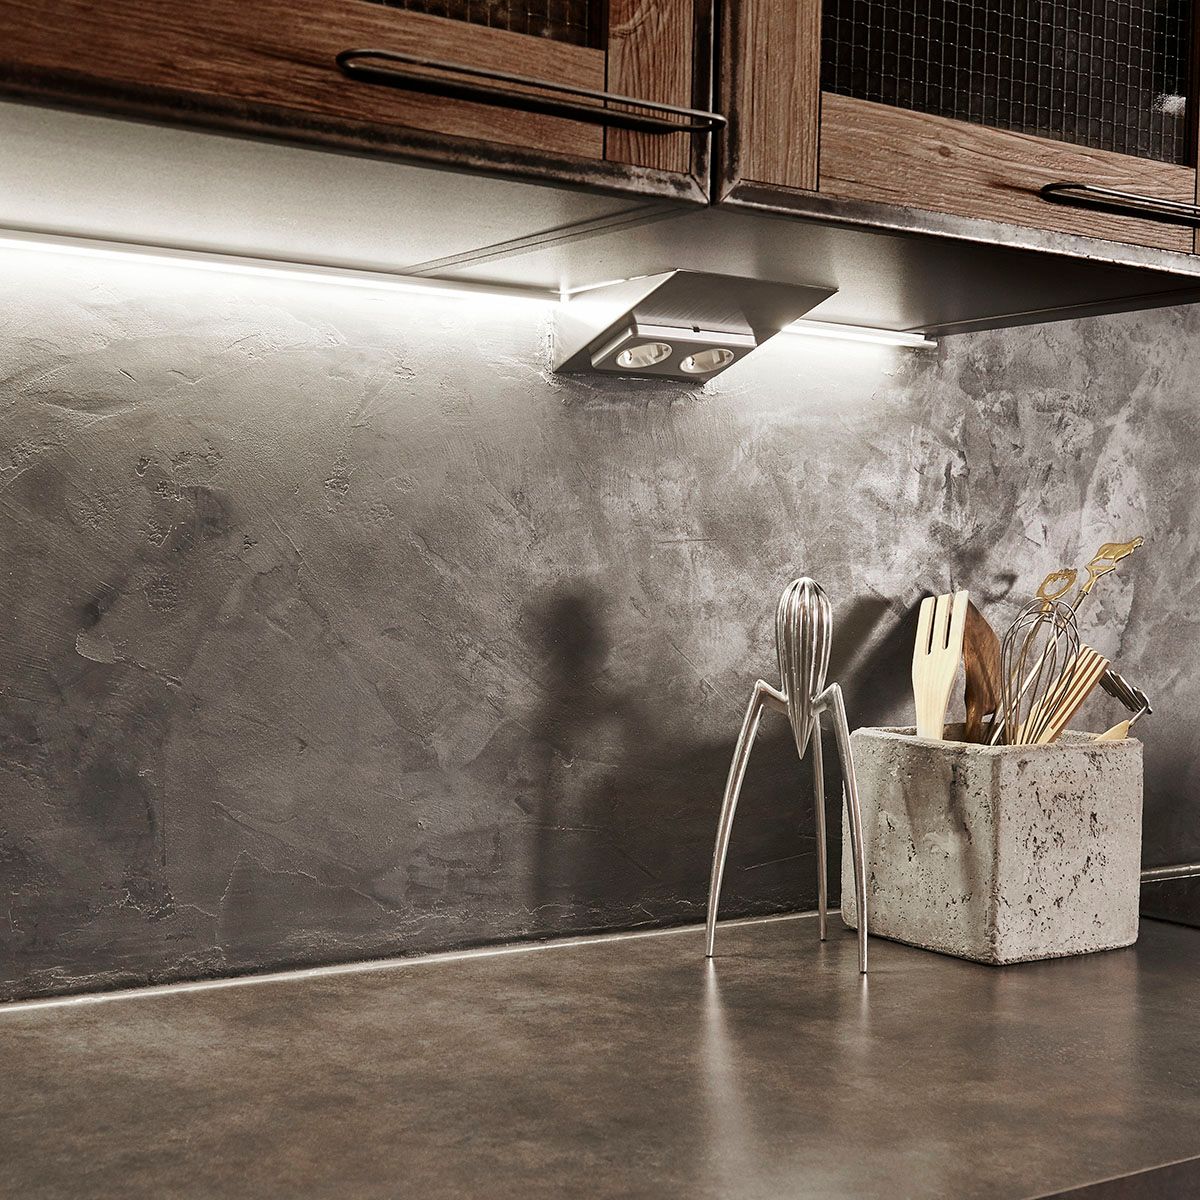
LED strip light for kitchen partition set
Doing a kitchen renevation and changing old lights to a led strip and now missing an on/off button? Not to worry! This set has a wireless dimmer button that you can place freely on any wall in teh kitchen! So with the wireless dimmer, you can conveniently control lights that only have electricity coming from the wall, but don't have their own wall switch (often old kitchens that used to have switchable fluorescent tubes).
Includes
LED strip light for kitchen -set includes:
- 5 meters of 14,4W/m 4000K led strip
- Suitable power supply which includes a wireless Zigbee receiver
- VaLO Zigbee series wireless push button (the button can be placed on the wall or kept detached)
- Two surface-mountable aluminium profiles (length 2,52m per profile). Choice of several different profiles.
- 5 m 3-pole cable and 2 quick connectors
About
The 14,4/m strip has a light output of 1000 lumens/m, i.e. basic light output for a white kitchen. The led strip is always mounted on the aluminium profile that is always included and the 3M special tape on the LED strip ensures a good fixing to the profile. The LED strip is very slim.The strip has 120 leds/m and the light is even, whit no dots. Colour rendering index (CRI) of over 90!
The strip has only 15cm wires at each end as standard, so by cutting it at the relevant point (every 5cm), you get two strips. So if you want to cut more, you have to connect new wires to the copper points at the cut-off point. Package includes 5 feet of 3 pole wire and push-on connectors to extend the wire to the driver.
The profile for installation in the intermediate space is IP44 from the bottom, i.e. splash-proof, and IP65 from the top, something you can install without any worries under a drying cabinet. This way you get uninterrupted light in the space between the two. Aluminium is also easy to cut with a hacksaw or a circular saw, even with a powder blade.
The included driver doubles as a Zigbee 3.0 receiver. This means you can connect the driver to your smart home and control it with a Philips HUE or Samsung SmartThings system, for example. The driver has screw connectors on both ends, so you can plug it in with a fixed or plug-in connector (included!) and the connectors can accommodate two wires from different LED strips.
The wireless push button comes with a 3V battery and will last 1-3 years, depending on use. The button fits all frames using the 55m standard seamlessly. For example Schneider EXXACT series.
Of course, you can install this partition lights set in other places than the kitchen partition, such as on top of cabinets, on the ceiling border. The only limit is your imagination as you only need a plug, not an electrician.
Which led profile where?
A corner profile for when the led strip in the kitchen is to be on the back wall OR you want it to also act as a light strip illuminating from the front edge to the back.
Low profile when the led strip to the kitchen is 5cm behind the front edge. In this case the led strip illuminates downwards and is in the middle of the gap. The low profile can of course also be installed on the back wall, when you want to emphasise the back wall.
There are several colours to choose from for the low profile.
Installation
The strip should be bonded to a metal, such as an aluminium profile (supplied), to allow heat to be conducted away from the LED circuit. Proper cooling will prolong the life of the LED. Led tape does not bend laterally.
Installation of the strip:
1. Cut the profiles to measure and the LED strip to the correct length (NOTE! Led strip needs to be shorter than profile and can be cut every 5cm where marked).
2. Tape the led strips to the profile on the table before fixing the profiles and press the covers into place.
3. Screw the profile brackets to the bottom of the cabinet. 4-5pcs / 2,5m and snap the profiles into place.
4. Run the wires from the led strip to the driver (hole in the grommets 7mm) and connect to the screw terminals.
5. Put the plug in the wall and make the pairing between the button and the driver.
Pairing the button:
1. Press the button on top of the driver four (4) times in a row FAST. 4 (four) times (4).
2. Place the button next to the driver (10cm).
3. Press two buttons (1 and 0) simultaneously for more than 3 seconds. The indicator light flashes rapidly, then immediately double press 1.
4. Hold the button next to the driver. The pairing takes about 10 seconds. The led strip flashes three times when the pairing is successful.
Pairing the driver and the button Philips HUE or other Zigbee network:
1. Open your app "add a light" or similar. The driver can be found as a new lamp and you can control with the app.
2. Press the button on top of the driver five (5) times in a row FAST. The Led strip will flash three times.
3. Open your app to "add a light" or similar.
4. Press the two buttons (1 and 0) once.
5. NOTE! The app will NOT CREATE ANYTHING! But the Green light on the button will flash rapidly 3 times, indicating that it is paired! So the button is connected to the Zigbee network, but it is not configured in the app!
6. Press the button on top of the driver 4 times in a row FAST. The Led strip will flash three times.
7. Place the button next to the driver (10cm)
8. Press the buttons (1 and 0) simultaneously for more than 3 seconds. The indicator light flashes rapidly.
9. Hold the button next to the driver. The pairing takes about 10 seconds. The Led strip flashes three times when the pairing is successful.
10. You can control from the button AND from the app.
If after pairing the button you can no longer control from the application, an error has occurred during the pairing of the button to the Zigbee network. So even if the app "can't find the lamp", following the button's indicator light will show that it is connected to something. This is important! So the button has to be on the same network. If you didn't succeed the first time.. start over from point 1.
Lights in between, but who is the set for?
The lights in this kit are suitable for kitchens, livingrooms, bedrooms and more! For people who are not afraid of installation and tinkering.
As this kit will likely require some tinkering, if you feel that daunting, feel free to contact us and order everything made to measure.
| Guarantee (year) | 3 years |
|---|---|
| Colour rendering (CRI ±3) | 90 |
| Model | STRIP-4000K-Zigbee-SET |
| Lumen | 5,000.00 |
| Color | Mattblack, Mattwhite, Grey |
| Voltage (V) | 24 |
| Color temperature (K) | 4000 |
| Watt | 72.00 |
| Lifespan | 35000 |
| Dimensions | Set is 5m long, can be easily used as 2x2,52m |
| Approved | CE, RoHS |
| Energy class | B (185lm/W) |
| Muuta | Wireless dimmer set included |
| IP Class | IP44 |
Customer Reviews
Customer Questions
Installation
The strip should be glued to a metal, such as an aluminum profile (included), so that the heat can be conducted away from the LED circuit. Proper cooling extends the life of the LED. The led strip does not bend sideways.
Kitchen worktop light installation:
1. Measure the installation location
2. Cut the profiles (circular or metal saw) and led strips to the right size (every 5 cm from the cutting point)
3. Tape the led strips to the profile on the table before attaching the profiles and put the covers in place by pressing.
4. Screw the profile brackets to the bottom of the cabinet. 4-5 pieces / 2.5m and click the profiles closed.
5. Take the wires from the led strip to the transformer (wire dirll hole is 7mm) and connect to the screw terminals.
6. Put the plug in the wall and make a pairing between the button and the transformer.
Button pairing:
1. Press the button on top of the transformer four (4) times in a row QUICKLY. The led strip flashes three times.
2. Move the button next to the transformer (10cm)
3. Press two buttons (1 and 0) simultaneously for more than 3 seconds. The indicator light flashes rapidly, then immediately double press 1.
4. Hold the button next to the transformer. Pairing takes approx. 10 seconds. The led strip flashes three times when the pairing was successful.
Pairing the transformer and button Philips HUE or other Zigbee network:
1. open "add a lamp" or similar from your application. The transformer can be found as a new lamp and you can control it with Application
2. Press the button on top of the transformer five (5) times in a row QUICKLY. The led strip flashes three times.
3. open "add a lamp" or similar from your application.
4. Press the two buttons (1 and 0) once.
5. NOTE! The application CAN'T FIND ANYTHING! But the green LED on the button will flash three times quickly to indicate that it is paired! Thats it, the button has been allowed to the Zigbee network, but it is not defined in the application!
6. Press the button on the transformer 4 times in a row QUICKLY. The led strip flashes three times.
7. Move the button next to the transformer (10cm)
8. Press the buttons (1 and 0) simultaneously for more than 3 seconds. The indicator light flashes rapidly.
9. Hold the button next to the transformer. Pairing takes approx. 10 seconds. The led strip flashes three times when the pairing was successful.
10. You can now control from the button AND from the application
If after the pairing of the button you can no longer control from the application, an error occurred during the pairing phase of the button to the Zigbee network. So even if the application "doesn't find the lamp", by following the button's indicator light you can see that it is connected to something. This is important! The button must be intalled to the same network. If you didn't succeed the first time.. start over from point 1.