
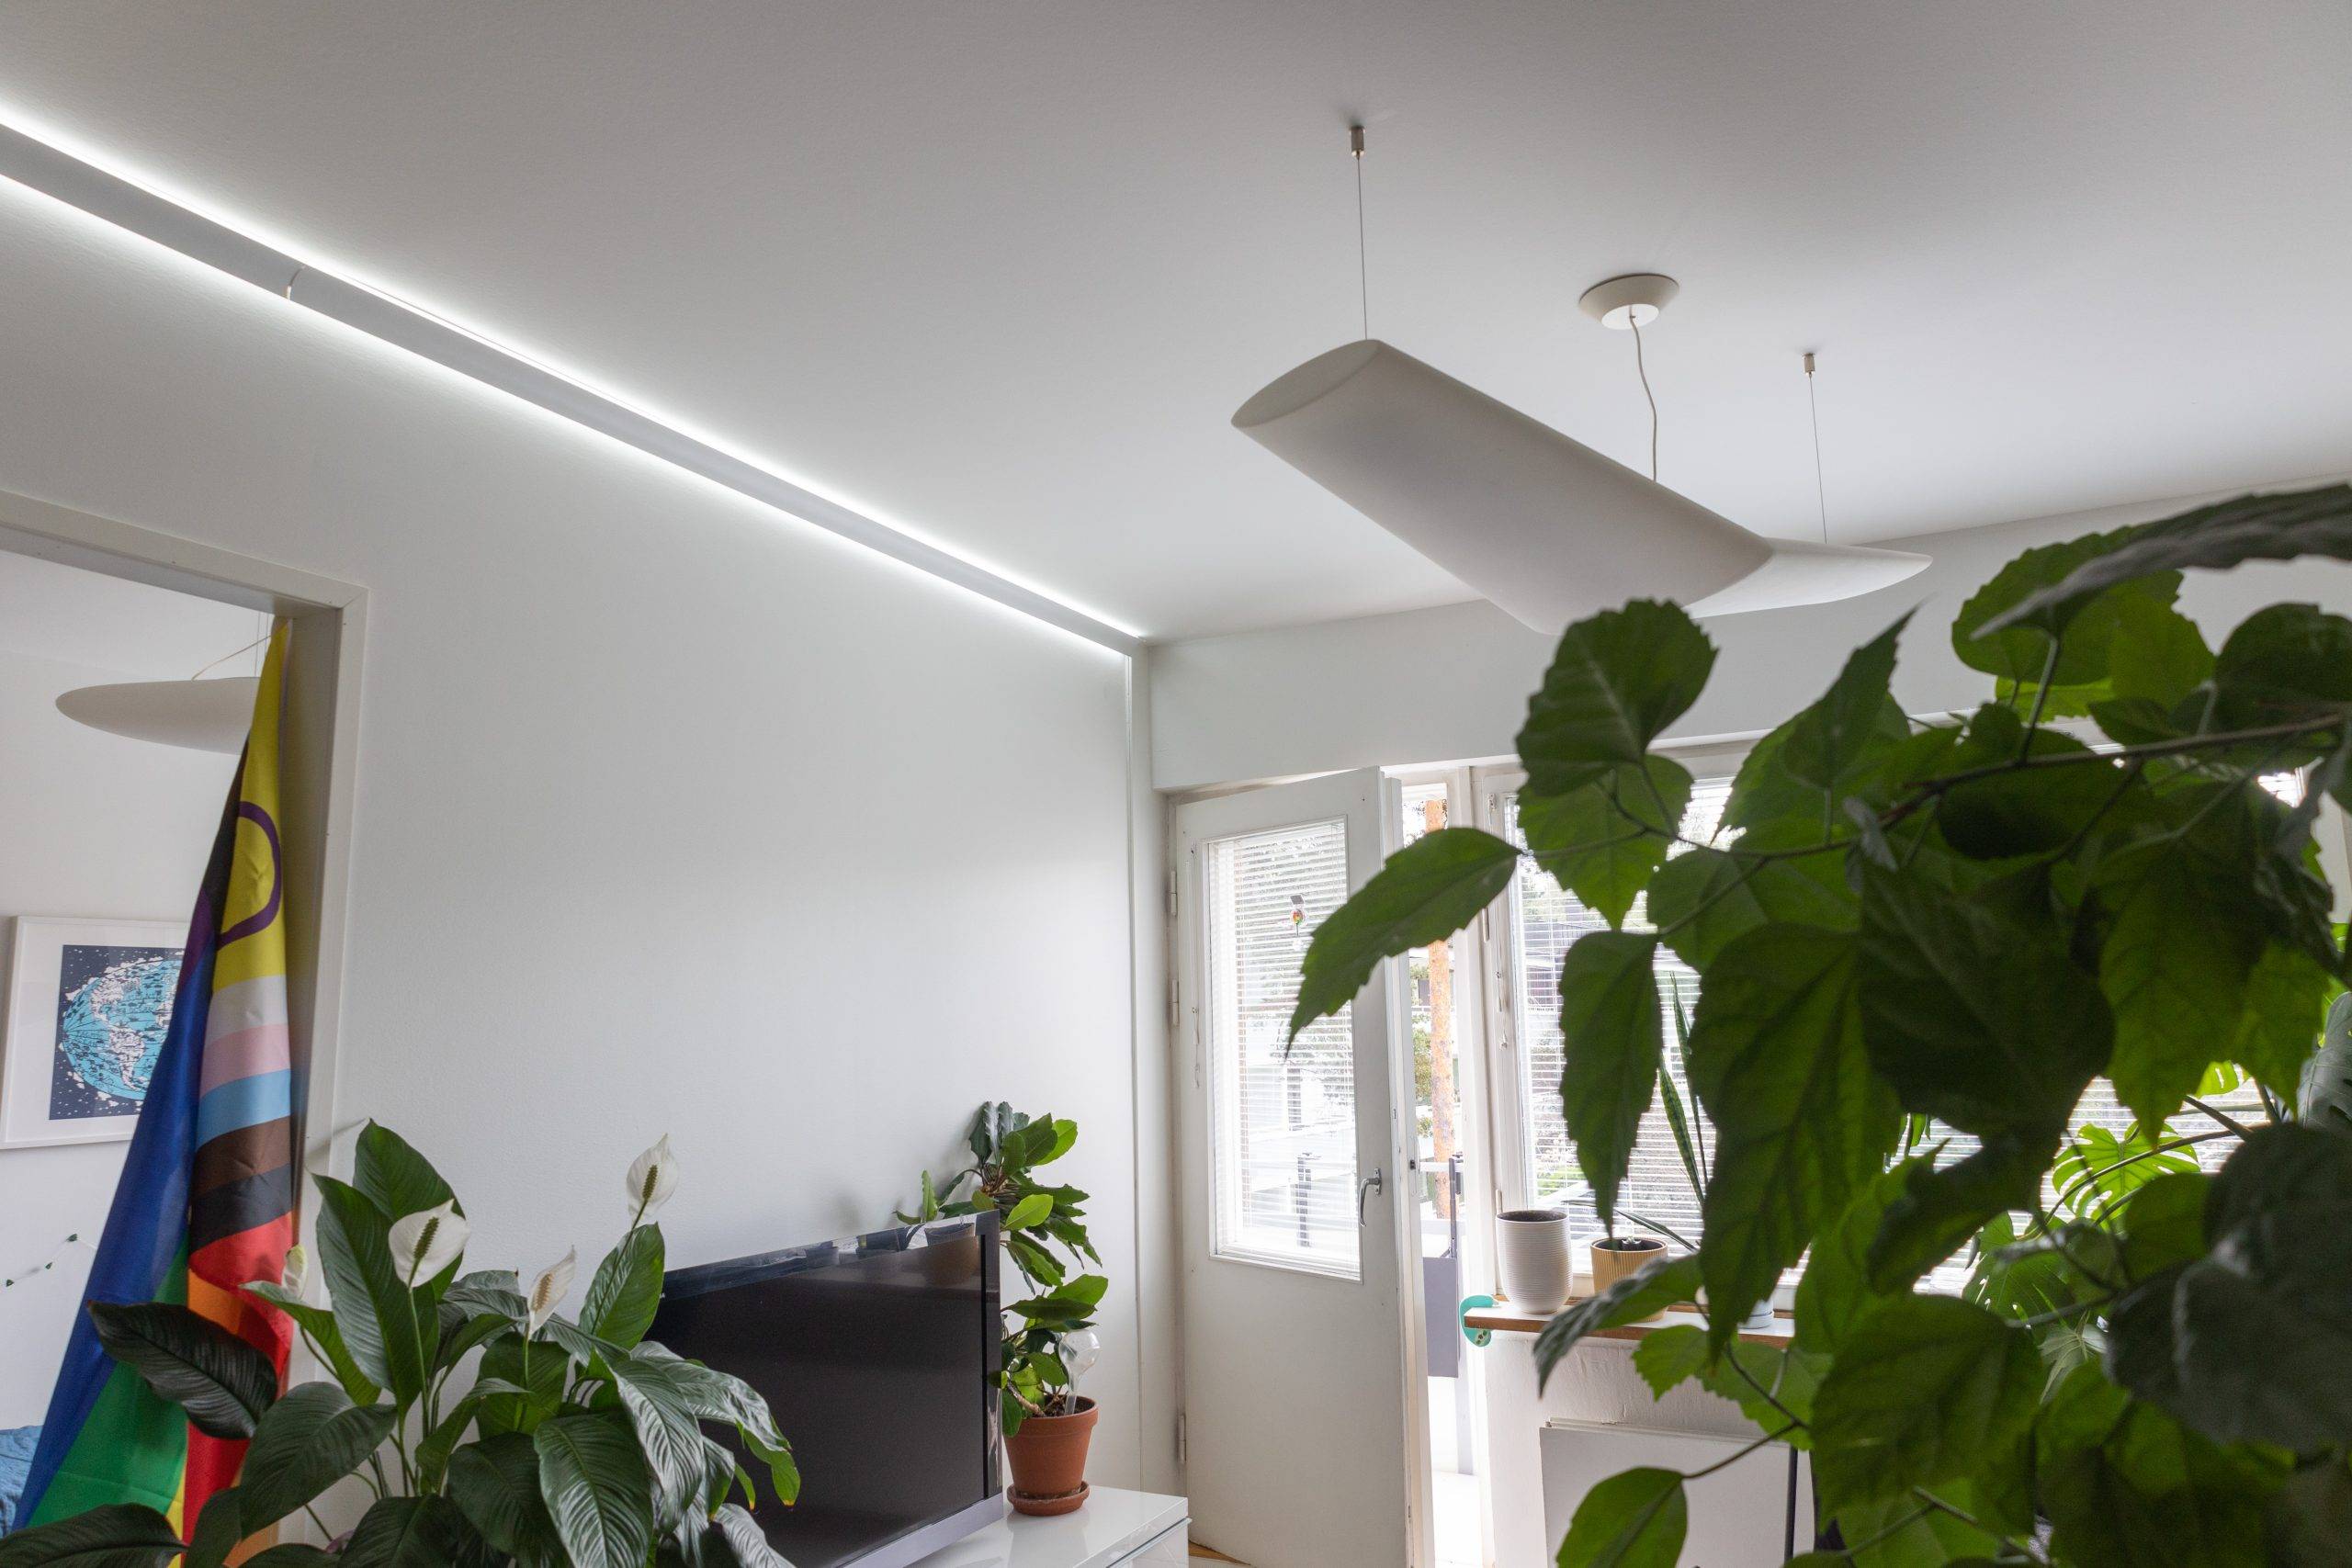
We live in an apartment building built in the 1960s, so there are only two places for the ceiling lights in the living room of our apartment. So the living room is relatively deep and it seems that especially the other end of the living room is very dark in the winter. Initially, we thought about installing spotlights in the living room, for more efficient lighting. However, the room height in the apartment is relatively low, so lowering the ceilings further did not seem a sensible option. The alternative was to install an LED strip in the living room.
Efficient and comfortable lighting for your living room
We decided that the best solution for our situation would be a full-length LED strip installation. We were hoping to control the tape wirelessly, as the product comes as a retrofit and we have no intention of renovating the apartment at the moment, as the previous renovation was completed about five years ago. Wireless buttons avoid spaghetti wiring and allow you to control the colour temperature and dimming of your luminaires.
RGB+CCT led strip
The LED strip chosen was RGB+CCT LED strip, which allows the strip to produce different shades of white from warm to cold (CCT 2500K-6500K) and different colours (RGB). We chose this led tape because of its versatility. We wanted the white from the LED strip to have a good colour rendering (CRI 98) and to have a neutral (4000K) white available alongside a warm white for the evening "twilight glow". In RGB+W strips, getting this warmer light clean is a challenge, as it is usually a combination of 4000K white and amber LEDs. I think a more beautiful warm white light is achieved with CCT LEDs.
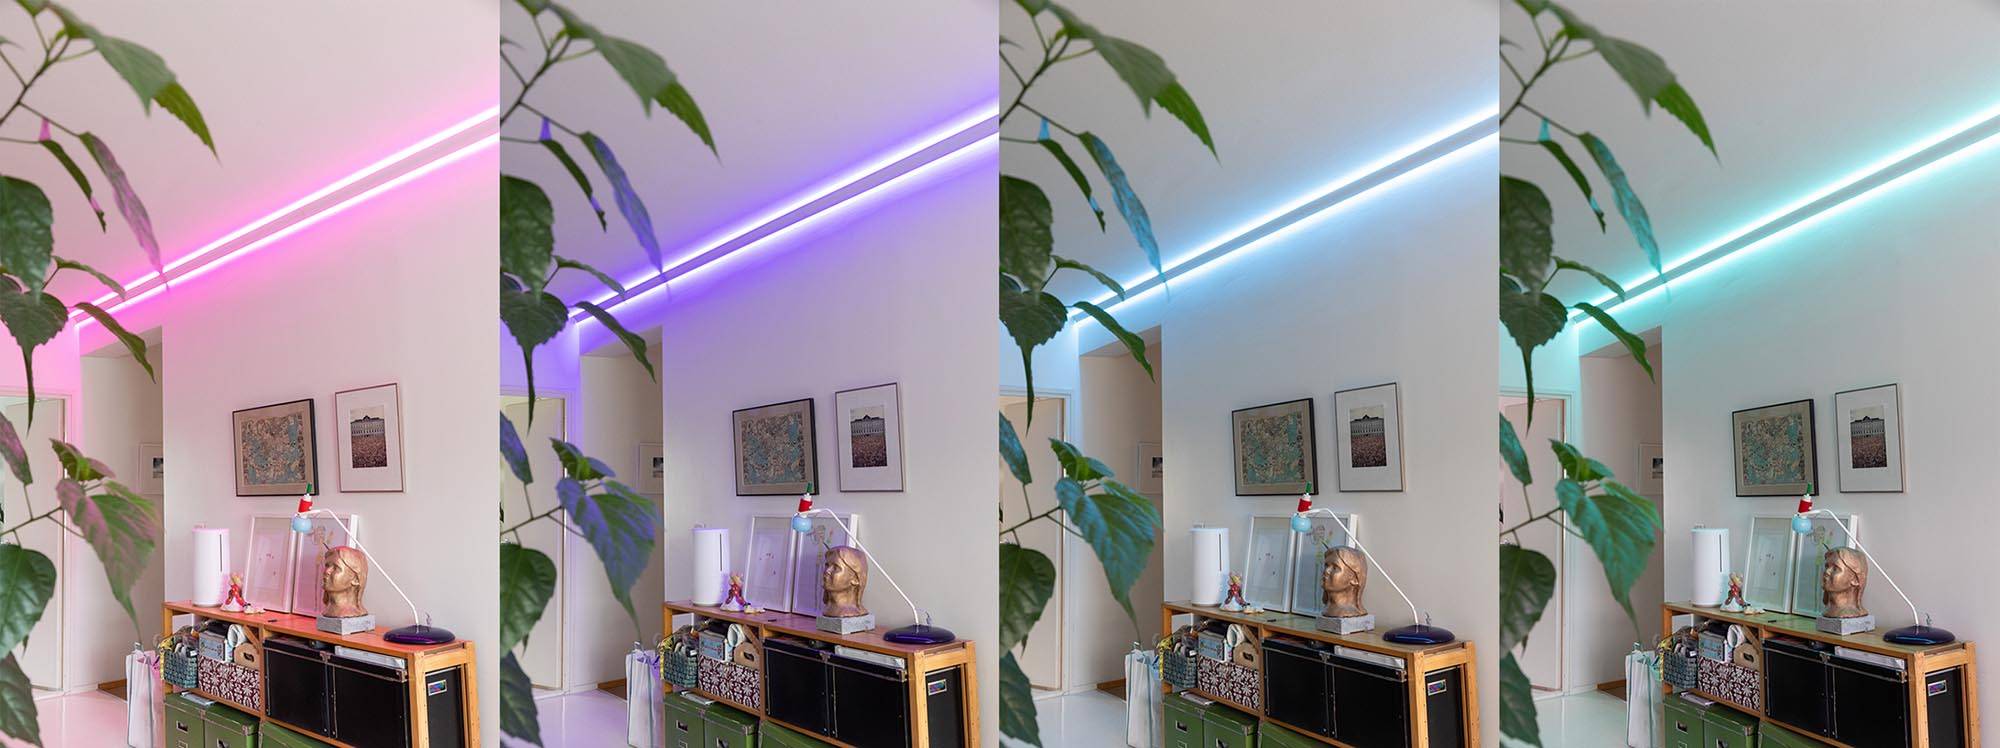
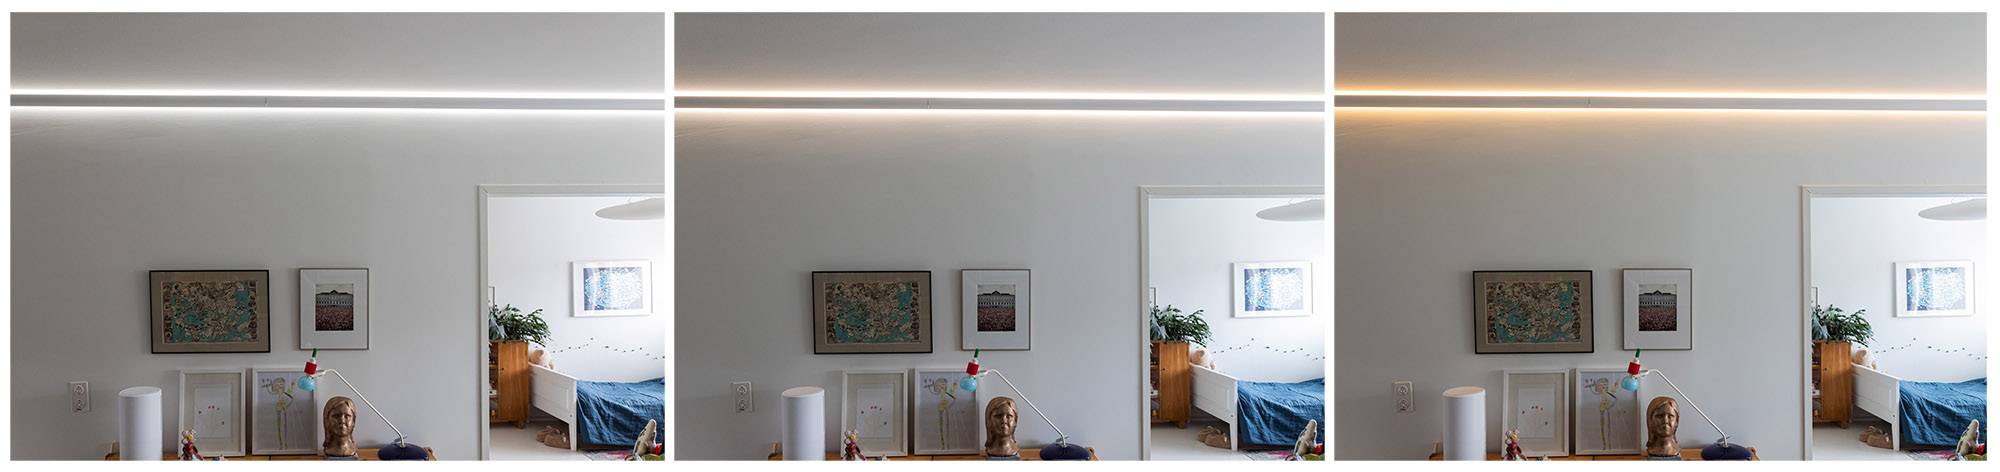
Indirect-3 curved profile
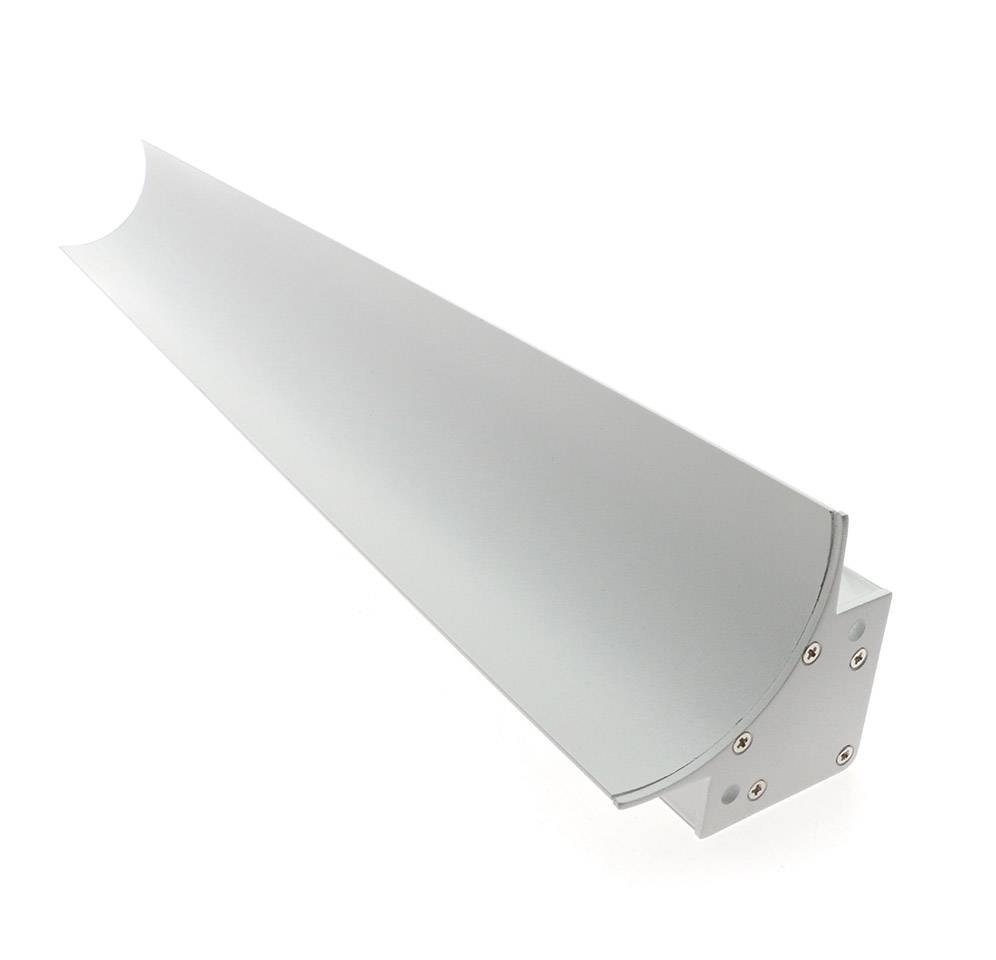
Of the profiles, we chose an arc profile that gives light in the direction of the edge. The light is directed from the profile along the wall and ceiling and the installation is therefore made at the junction of the wall and ceiling. One of the reasons we chose this profile was that we wanted the solution to have a high light output, which was achieved thanks to the fact that the profile comes with two strips.
We have a profile that runs the length of the living room, so it's about 7.3m long. The installation consists of three profiles mounted on the bush. The profiles come in 2,52m and can be shortened to a suitable length. There are two mounting points for the strips in the profile, both with white diffusers to even out the light. If the finished length of the profile exceeds 2.52m, the LED strips can only be fixed in place once the profile has been fixed to the wall.
The surface profile is a beautiful matt white and the surface resembles a sandblasted material. The profile should be fixed to the wall by drilling from the corner. The profile arch is removed for the duration of the fixing. The arch is fixed in place by pressing it back into the profile.
Zigbee wireless lighting control
CCT+RGB led strip is controlled by RF or Zigbee devices. We chose Zigbee because we are thinking of getting a Zigbee bridge (e.g. Philips HUE) to control the lighting with mobile devices. Currently, the light is controlled by a wireless CCT+RGB control button, which was paired with a Zigbee 24V receiver. The receiver was installed between the 240W 24V IP 65 driver and the led strips and paired with a wireless button. With RGB+CCT led strips, a receiver between the driver and the strip is currently always used, because drivers with a built-in receiver can only control monochrome, CCT and RGB+W led strips, but not CCT+RGB led strips. So the products installed: 230V driver -> receiver -> led strips.
If you want to time and program the light or use it on a mobile device, you also need a Zigbee bridge or hub, such as Azoula, Philips Hue, Samsung Smart Things or Conbee2, which can be controlled by e.g. Home assistilla. Home assistant can be used to control many other things besides lights, such as cameras, thermostats and can be loaded with a The choice depends on how precisely you want to control the light, for example. whether we want the lights to match the circadian rhythm. More information about circadian rhythm in English.
In addition to this light, our idea is to control the other lights in our apartment as we make small upgrades to them. We plan to purchase CCT adjustable E27 bulbs and 230V receivers to control the lights.
Tape installation in the living room
Although it is possible to install 24V products, which are manufactured as plug-in products, we decided to buy the installation for the luminaire to save our time and nerves. The installation of the Led strip and fixing the profiles, as well as other work, took about three hours, some of which was spent aligning and adjusting the profiles due to our slightly curved wall. In the pictures below, I explain the installation steps and other things to consider.
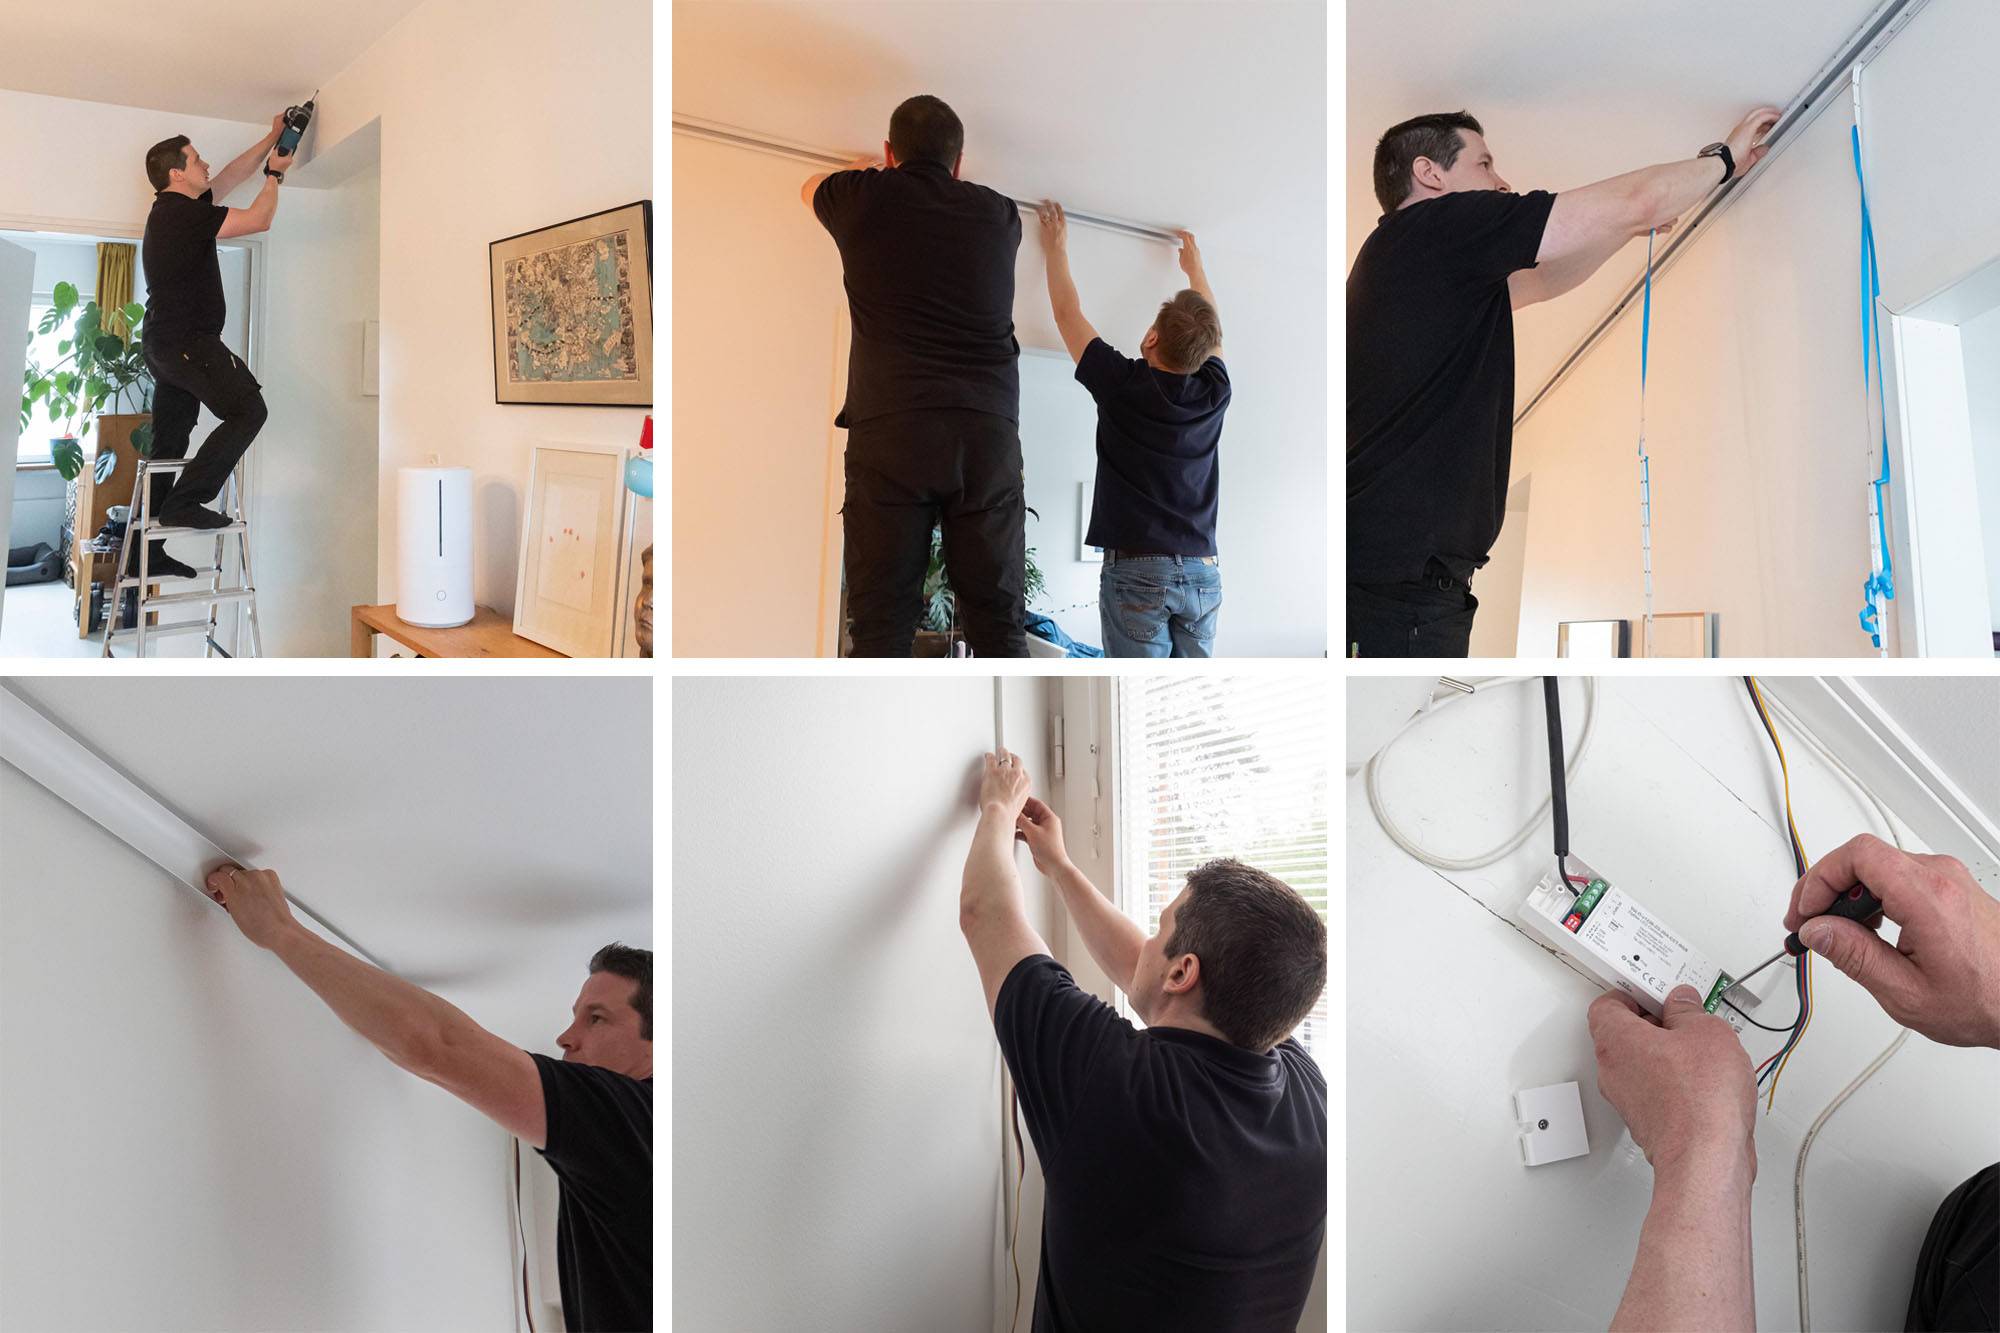
1. Product selection
When selecting the products, we took precise measurements of the installation site, because we knew that we wanted the products to be made to a certain size, ready-made at LedPaja. We chose the products based on our requirements, which were colour control (RGB), colour temperature control (CCT), spotless light and a good colour rendering index. We also wanted the light to be efficient enough for supplementary lighting.
2. Making the strip and profiles to finished dimensions in LedPaja
In this project, LedPaja drilled holes in the profiles ready for installation. The strips and profiles were made to the given dimensions. The LED strips were also connected to each other, so that there is only one wire from the profile to the driver instead of two. This step can also be done by a clever solderer, but it is indeed worth noting that the small strip is soldered to a six-conductor cable. That's why I left the RGB+CCT LED strip soldering to the electrician.
The strips were pre-glued to one 2.52m profile and the rest of the strips were left on the coil to wait to be glued to the profile once all the profiles were attached to the ceiling. This was also to finish the headboard neatly. A plug was also pre-installed in the transformer.
3. The installer arrives at the site and checks the products
We only needed one installer, because my husband and I were assisting the installer when the profile was being fitted to the ceiling. As the profiles are 2.52m long, two people are needed at a certain stage of the installation if the installation is to proceed smoothly. The LED strips were tested before the installation started, just in case one of the products had failed during transport.
4. Drilling holes in the wall, at the pre-drilled holes
The profile hole locations were marked on the wall and holes were drilled. Props were put in the holes to make the installation strong. The fixing method depends on the wall material.
5. Fixing the profile to drilled and tapped holes
During this installation phase, helping hands were needed to ensure that the installer could hold the profile in place during the fixing process. This is especially important for installations over 2.52m where the profiles are installed in the bush.
6. LED strip mounting on profiles and testing
Once all the profiles were attached, it was time to glue the LED strips to the profiles along the entire length of the profiles. The Led strips were retested at this stage to see if any of the strips had been damaged during installation. The LED strip is easy to install because it comes with a tape.
The curved cover of the profile was also fixed at this stage. To attach the curved profile cover, it must be installed at the right angle and tapped into place. This requires a little force and an auxiliary hand to hold the other end of the cover. As our walls were slightly curved in the typical 60's style, we had to adjust the fixing slightly (loosening some screws). We also positioned the curved lid carefully to get the curve to line up nicely at the joints.
Optimally implemented, the diffusers and arcs of the profile are positioned so that their joint points are at different points than the end points of the profiles. However, the curvature of our wall was such that this was not worthwhile.
7. Running the wires neatly from the profile to the transformer.
To run the wires down, I bought a sleek wire grab from a hardware store to match the tone of our wall. Our installer would have found a gutter, but I wanted to get it myself. As there is a post inside our living room wall that is slightly different in height from the rest of the wall, the cable duct was nicely tucked into that corner and was very unobtrusive. The wiring of the RGB+CCT led strip is flat cable and very multicoloured, so it has to be hidden somewhere to make a neat installation.
8. Wireless control pairing between the controller (Zigbee) and the receiver.
The installer paired the button and receiver for me and would have paired it if necessary, e.g. Philips HUE app. However, it is worth expressing such wishes when ordering the installation or assembly.
Read more:
Check out our LedPaja installation service if you are interested in custom-made LED strip lighting.
Subscribe to the LedPaja installation service if you need help with installation.
LED lighting expert
LedStore has been an expert in LED lighting since 2010. We have our own product design, so our products are technologically state-of-the-art.
Our focus is on luminaires with colour temperature control and high colour rendering. We do around 500 lighting designs in a year.
Remember that we are always ready to offer our help to you along the way, by email (myynti@ledstore.fi) and by phone (045 251 4510). As always, feel free to share photos of your own projects on social media on #ledstorefi IG and ledstorefinland FB. We love to see the cool things you do with our lights, and it helps provide inspiration for other renovators and builders. Did you know that we already have over 3500 pictures of installations with LedStore lights in our gallery!
Photo gallery of LED lights:
Product gallery: Pictures of PRODUCTS in different installation locations
Indirect light: Indirect light in different spaces
Room-specific: Light in different rooms
References: Complete houses that have been photographed