
LED strip lights are a popular lighting solution that offers versatility and adaptability for a variety of lighting needs. In this article, we’ll discuss how to cut and splice low-voltage LED strip lights (12V or 24V) as needed.
How LED Strip Lights Work
An LED strip consists of small LED lights connected together to form a single strip. The strip is divided into modules, each with a cut-off point at its end. The modules are electrically connected in parallel along the strip, which allows the strip to be cut and extended.
In other words, if you cut the strip anywhere other than at a cutting point, the entire section of the strip between the two cutting points will be dark.
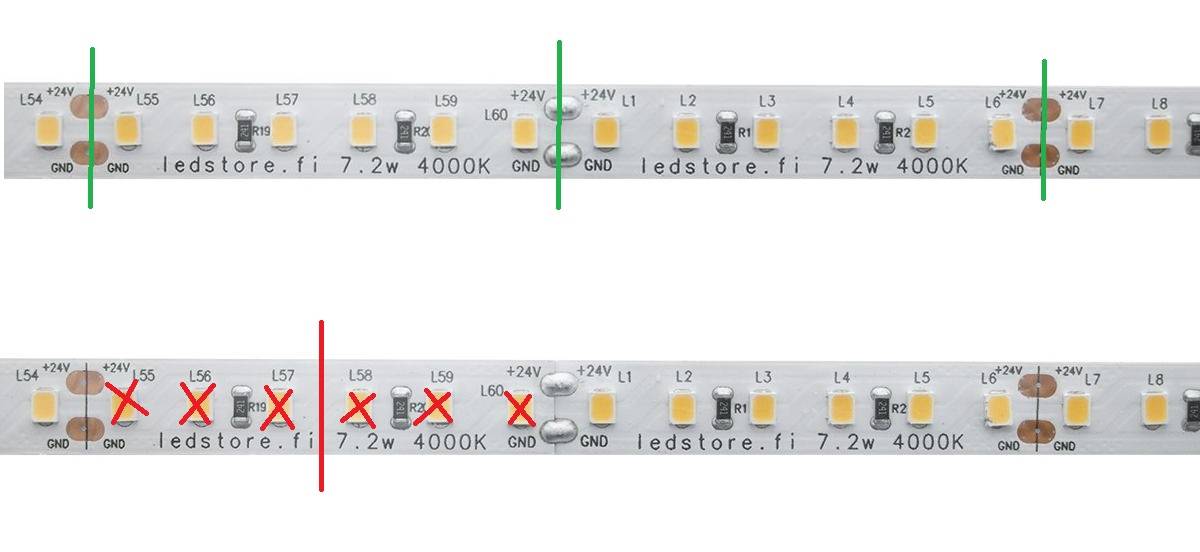
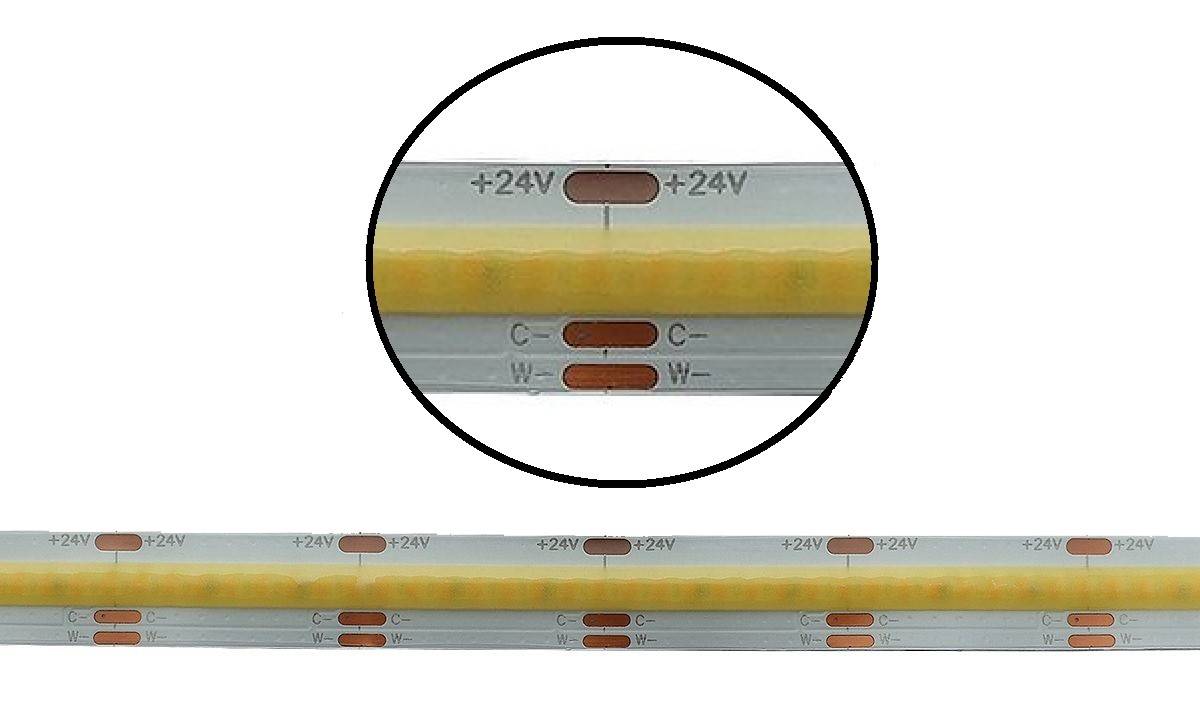
This applies to both traditional SMD LED strips and dotless COB LED strips.
Reasons for cutting an LED strip
LED light strips can be cut for many reasons. Most commonly, cutting is done when you want to shorten the strip or use it in multiple different locations. Cutting also allows the strip to be adapted to different spaces and lighting needs.
The most common need to cut the strip arises at corners. An LED strip cannot bend 90 degrees to the side. It must be cut, and a small splice must be made with a soldering iron to bridge the bend.
Basics of Cutting LED Strip Lights
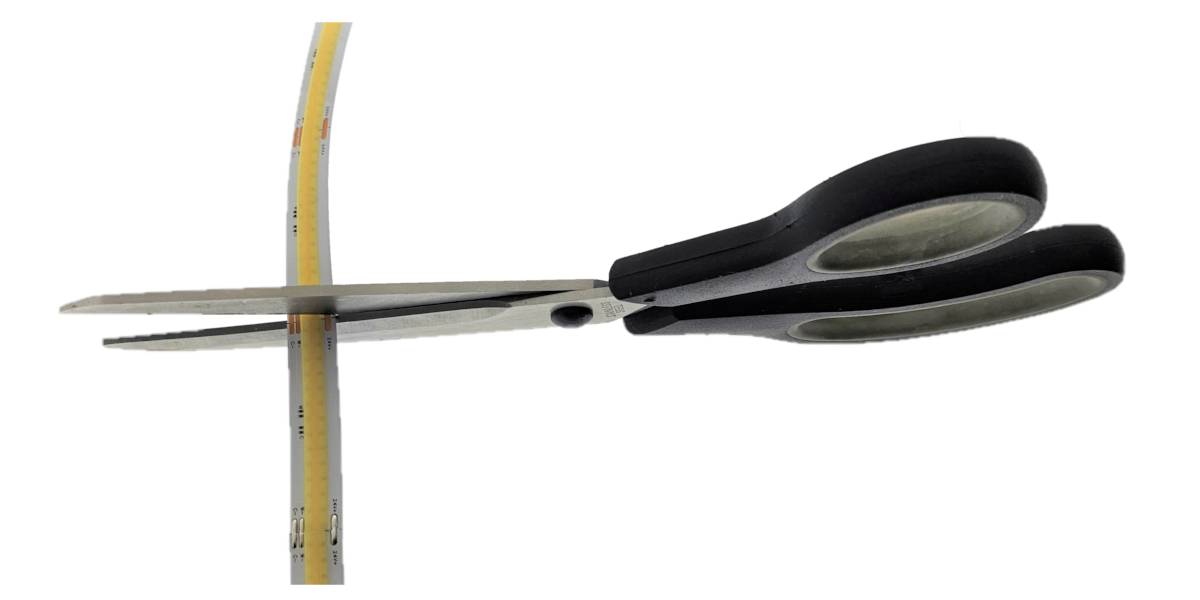
You only need a few supplies to cut an LED strip. The most important tool is a pair of sharp scissors, which allow for a smooth and clean cut. It’s important that the strip doesn’t twist at the cutting point to ensure the best possible cut.
By cutting in the middle of a mark, you’ll still have good soldering points left for reusing the strip.
Determining the Voltage and Cutting Points of an LED Strip
Low-current LED strips can generally be cut every 3 or 6 LEDs. The strip has copper solder pads at the cutting points, and the cutting points are often marked with small scissors icons. Only cut the strip when it is de-energized—that is, when the LED strip is not connected to a power supply. Mains-powered LED strips are also available on the market; however, due to the risk of electric shock, working on them is a job for a licensed electrician. You can naturally identify a mains-powered LED strip by the packaging, which is labeled 230V, but the LED circuits on the strip itself are also marked with the letters L and N. Low-voltage LED strips never have “L” and “N” markings, so there’s no risk of mixing them up.
If you’re unsure about the voltage of the LED strip and can’t reliably determine it, do not use the strip!
Steps for cutting a low-voltage LED strip
- Measuring an LED strip - Measure the strip and mark the point where you want to cut it.
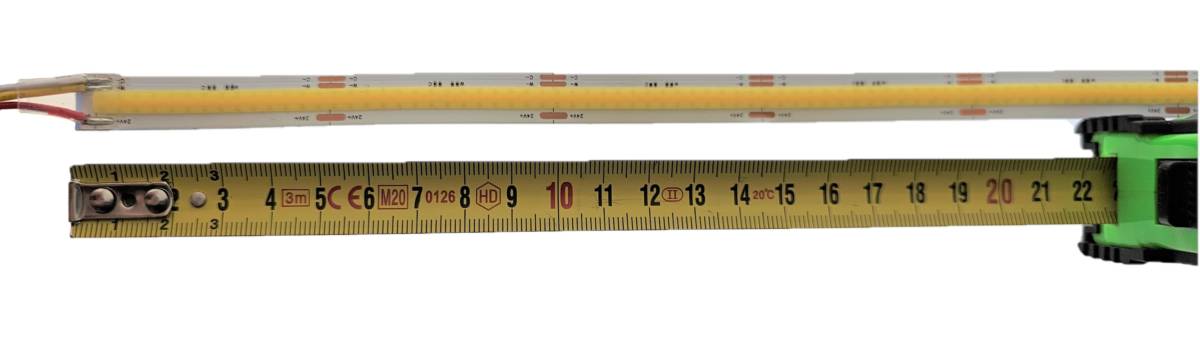
Marking the LED strip - Mark the strip at the cutting point.

Cutting the LED strip - Cut the strip at the marked point using sharp scissors.
Treating the ends of the LED strip - Treat the ends of the cut strip as needed, for example, to make them waterproof by applying adhesive, silicone, or heat-shrink tubing. This is necessary for outdoor installations. The ends of an LED strip installed in a dry environment or inside an aluminum profile can be left untreated.
Reconnecting LED Strip Lights
There are connectors available for LED strips that allow you to rejoin the strip after cutting it. Connectors may sound like an easy solution, but based on years of experience, I can say that the only durable way to reconnect an LED strip is by soldering. Connectors can come loose, dust and grease can get in between, and it’s hard to find reliable, properly sized, high-quality connectors. So how do I reconnect the light strips to each other?
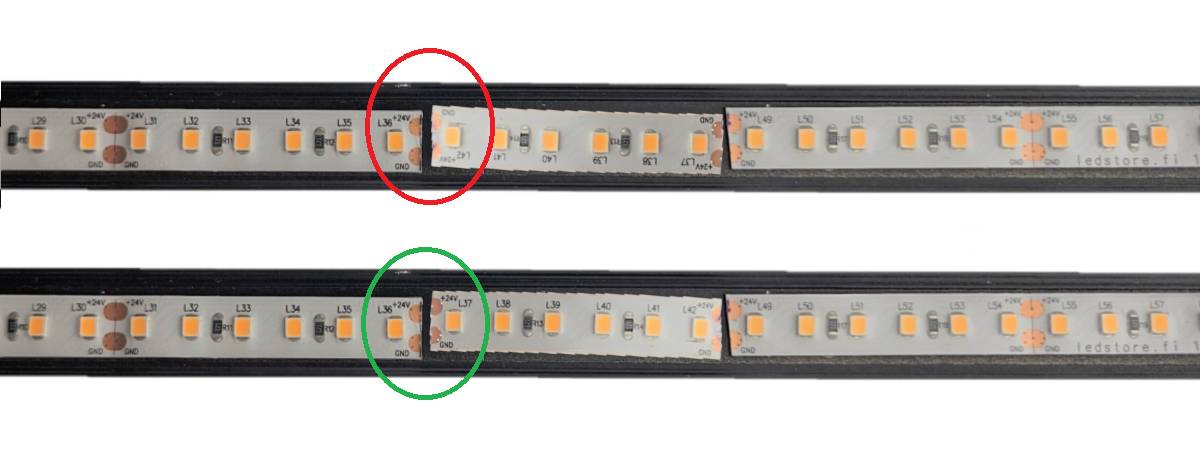
Place the cut ends of the LED strip together (make sure + is against +!) and solder the ends together.
Another problem with ready-made connectors is the variety of LED strips available; there are many types on the market, and each may have solder points in different locations, while the width of the strip itself varies.
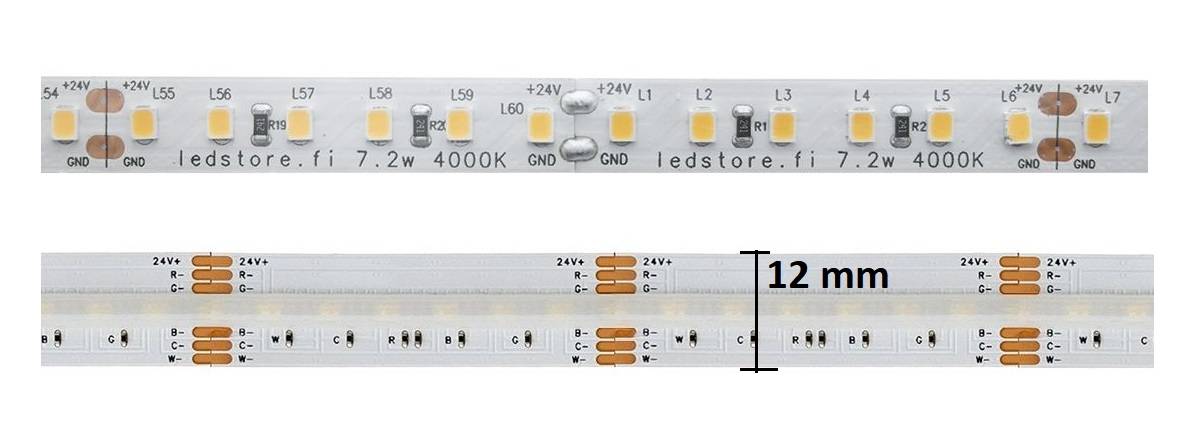
If you want to use a cut strip in multiple locations or adjust its length to suit different lighting needs, you’ll need to solder the ends together with a soldering iron. On the other hand, learning this skill is useful, and it isn’t impossibly difficult for basic LED light strips. RGBW and RGBCCT, however, pose challenges because there are 5–6 small solder points at the connection point.
Common Mistakes and How to Avoid Them
There are some common mistakes that can occur when cutting an LED strip. One of the most common mistakes is cutting the strip in the wrong place. It is important to cut the strip at the marked cutting points to prevent damage to the strip and to ensure it can be reconnected.
Another common mistake is improper handling of the strip after cutting. It is important to handle the cut ends of the strip correctly to prevent damage and ensure proper operation. This applies to IP65 LED strips installed outdoors. An unprotected cut end will collect moisture and damage the LED strip.
Summary
Cutting an LED strip is a simple process that requires only a few tools and basic knowledge of LED strips. Cutting the strip allows you to customize it for various lighting needs and spaces, making LED strip lights an extremely versatile lighting solution.
We hope this article helps you understand how to cut and splice LED strip lights.
LED Strip Light Installation Guides
- LED Strip Light Won’t Turn On—Why Won’t the LED Strip Light Turn On? Let’s Go Over the Reasons
- LED strip is flickering—Why is the LED strip flickering? There are many reasons, and we’ll go through them all.
- LED Strip Lifespan – What affects the lifespan, and why do some strips last longer?
- Mounting LED Strip Lights – How do I mount LED strip lights indoors or outdoors? What should I keep in mind?
- Connecting an LED light strip to a power adapter - How do I connect an LED light strip to different types of power adapters?
- Connecting RGB LED strips – How do I connect an RGB LED strip to different types of controllers?
- Extending LED Strip Lights – How do I solder the connections? A brief soldering guide for beginners.
- Parallel connection of LED strip lights – What does a parallel connection mean, and how is it done for LED strip lights?
- How the LED Strip Profile Affects the Light - How do the profile height and cover affect the light?
LED Strip Light Expert
LedStore has been an expert in LED lighting and lighting design since 2010. We have our own product design team, so our products are technically top-notch. Our product warranties last up to 7 years. We also provide lighting maintenance services.
We focus on temperature-adjustable fixtures with high color rendering, ensuring they perform brilliantly and last a long time. We complete approximately 500 lighting design projects for our customers’ properties each year. Read more here or order a design. Did you know? LedStore offers lighting design starting at 169 euros for your entire home!
Custom-Made LED Strips
We offer a service for custom-made LED strips, meaning LED strips in aluminum profiles tailored to your exact measurements. Installation is also available.
Remember, we’re always here to support you along the way via email (myynti@ledstore.fi) and by phone (045 251 4510). Feel free to share photos of your own projects on social media using #ledstorefi on Instagram and ledstore.fi on Facebook. We love seeing the amazing things people create with our LEDs, and it helps inspire those who aren’t yet convinced of the power and awesomeness of LEDs.
Did you know that we already have over 3,500 photos of installations made with our LEDs in our Gallery!
